Introduction
It seems to be Matworks has realized that there is an interesting market on the low cost hardware devices with hobbyist and DIY enthusiasts around the world. Several years ago they've started adding support to some microcontrollers as the Microchip DsPIC series using platform dedicated blocksets in Simulink. On this topic , I've uploaded a Youtube video about 2 years ago (link here ). They then continued adding similar support on much more popular platforms like Arduino which I've believe they started since 2012 or so. They then continued with more hardware including Android devices and the Raspberry Pi. Recently, they even released a low cost Matlab version for individuals similar to the student version . Kudos for Mathworks as there is a lot of people willing to "play" with Matlab but cannot afford the thousand of dollars on a licensee that it is actually intended for corporations. I believe Autodesk is having similar approach aiming to individuals and makers with free or very low cost options.
I have several Raspberry pi boards at my home for different applications running Raspbian, Archlinux, and OpenElect so i've decided to experiment Matlab with one of them and downloaded and installed the support package for RPI model B+ .
This process also involves flashing a microSD card with a Matalab configured Raspbian OS. Then, booting the RPI with this card will automatically autologin and start the windows manager. Once up and running , the RPI will communicate with the windows machine running Matlab. Depending which option you install the support package, the RPI can be connected point to point using an Ethernet cable or it can be configured sharing the same subnet as the windows machine running Matlab foe example on a home network.
As a proof of concept demo, I decided to use a popular Ultrasonic module. Below figure shows the model concept.
RPI with Ultrasonic Module. Click on image to enlarge
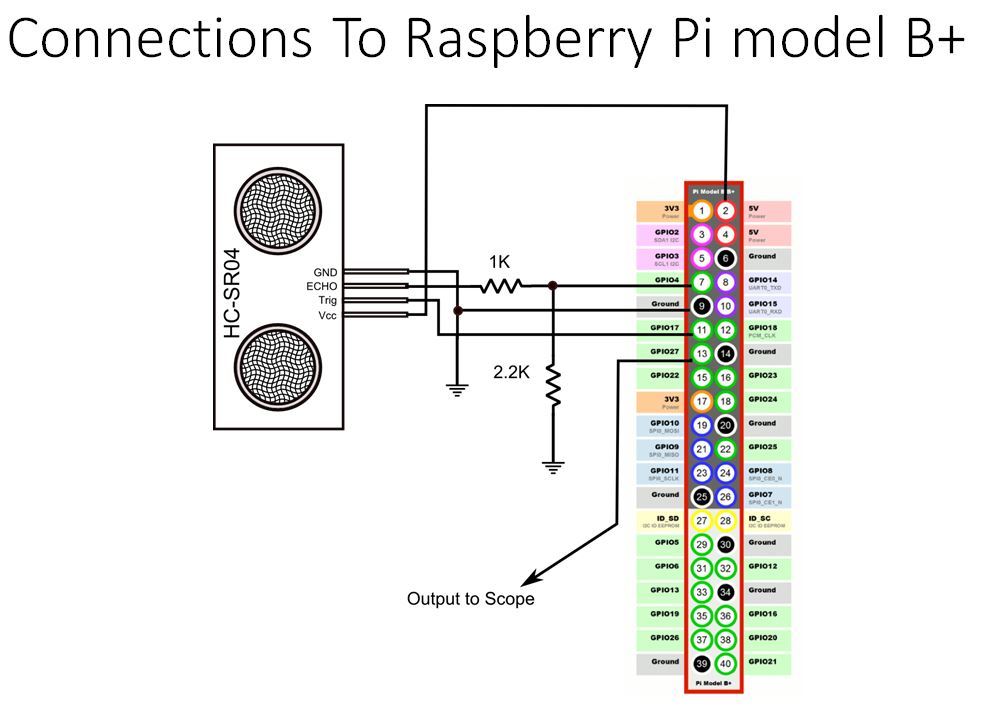
Next figure shows the wiring of the HT-SR04 and RPI GPIO pins.
RPI with HC-SR04. Click on image to enlarge
Then , it is a matter of creating a Simulink model and start adding and interconnecting blocksets. The complete example is shown in this video. The model file along with the Python code for the UDPreceiver display can be downloaded here.
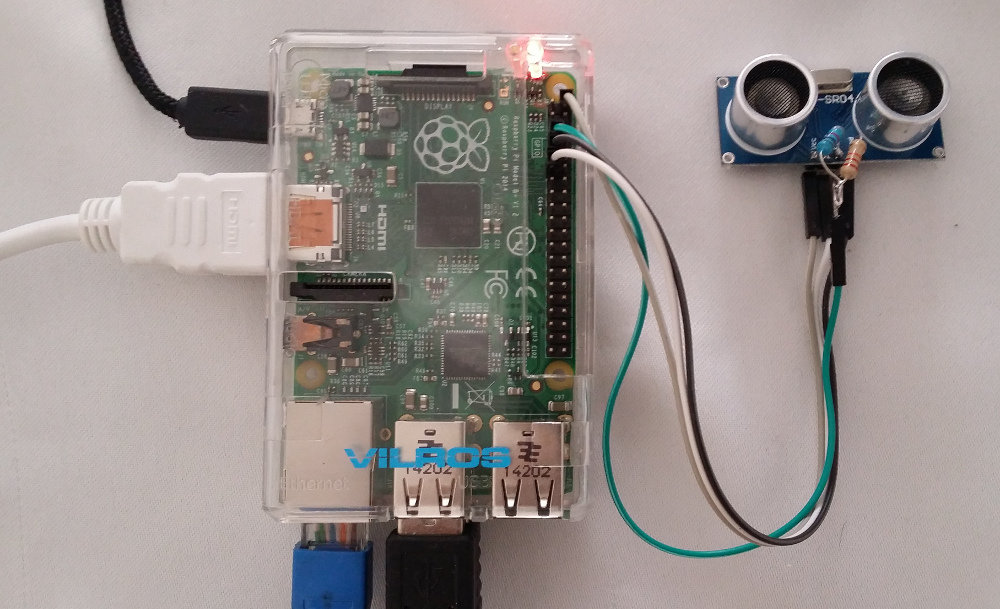
Raspberry Pi with all wiring. Click on image to enlarge


